Participate in a Polkastarter Sale: a Step-by-Step Guide
This is your in-depth guide explaining the exact process of how to participate in an IDO after getting successfully allowlisted.
If you are reading this, you have probably just won the Allowlist Lottery for a Polkastarter IDO or Private Sale. Or you got a guaranteed spot for having +50k POLS Power. If you’re looking for ways to win the allowlist lottery, see this article instead.
First of all, congrats! This guide will show you the step-by-step process of participating in an IDO or Private Sale after getting the good news.
Step 1: Prepare your wallet
First and foremost, kindly note that Polkastarter currently recommends using the desktop version of MetaMask as all the platform features are tested with it. Other desktop or mobile wallets may work, but support for mobile wallets in particular is something we are still working on.
Start off by checking which network the sale is on (e.g., Ethereum, BNB Chain, Arbitrum, Base, Optimism, Polygon, Solana or any other network we support) and make sure that you have enough of the corresponding tokens to cover volatility and network fees. While network fees range from a few cents to a couple of dollars, these can be high on the Ethereum network.
Volatility: Cryptocurrencies change in value fast. We recommend having at least a 10-20% buffer of what you need to participate. For example, let's say the allocation is $200, have $210-230 of the network currency ($ETH, $BNB, $MATIC, $SOL,...) in your wallet.
Network Fees: We recommend having at least $5-10 dollars worth just for network fees in general, and up to a 100-150% buffer on Ethereum. You’re unlikely to need them, but to be safe, it's best to keep that much.
All in all, here is what we recommend:
- Ethereum: keep a 120-150% buffer minimum
- Other networks: 20-25% buffer minimum
This should do it!
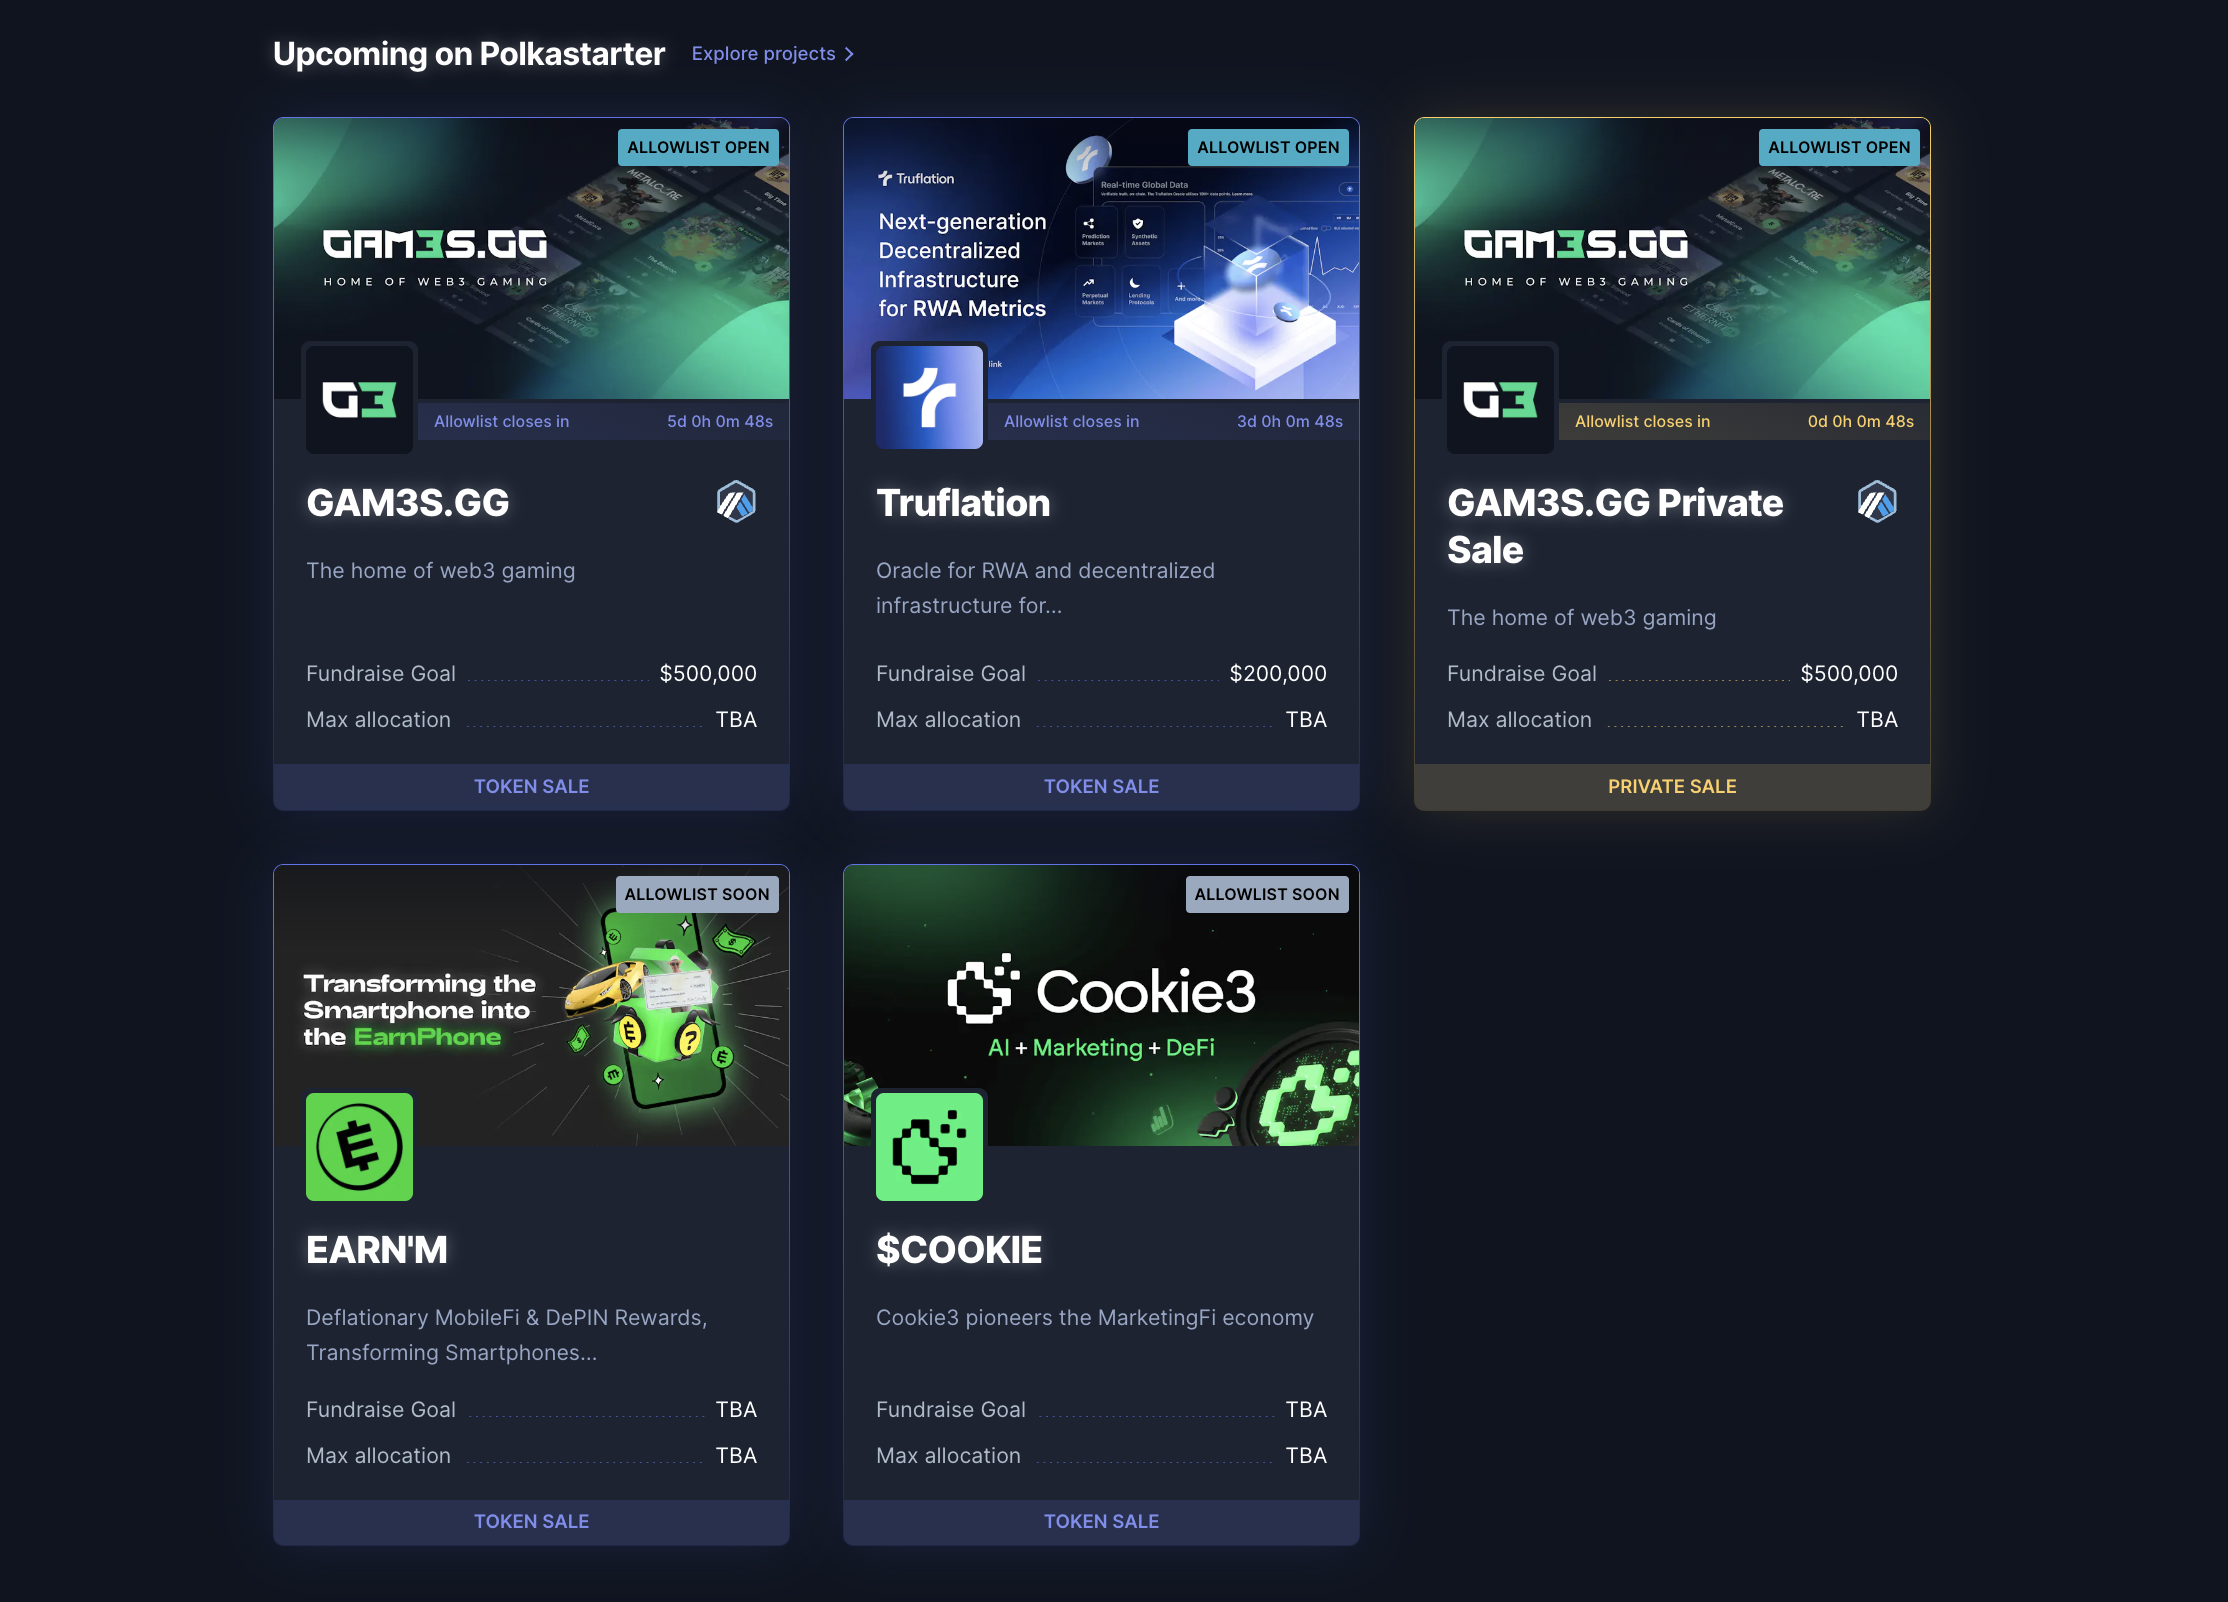
You can see the currently active projects on the Projects page. Every project has a little icon showing which network the sale is on when its confirmed. Some projects might have sales on multiple chains, so be sure to check which one you were allowlisted for exactly!
Don’t know how to get funds on the matching chain?
The easiest and most straightforward way for most users is to buy and withdraw assets from CEXs (centralized exchanges, like Binance or Kraken) on the network of interest. The native currencies of all major blockchains are available on the leading exchanges. You can find a list of markets supporting the given asset on CoinMarketCap or CoinGecko.
For decentralized options, you can opt to use DEXs (decentralized exchanges, like Uniswap or PancakeSwap).
Alternatively, there are several bridges you can utilize, like xPollinate (general all-purpose bridge). Most chains have their specific bridges as well, you can typically find them linked on the chain's website.
Step 2: Verify your allowlist status
You can easily do that through the Dashboard on the website. Once you’ve selected that from the menu up top, you’ll be able to see the status of all the allowlist applications you’ve applied to. You can also simply click on the individual project from the “Projects” menu and confirm your allowlist status from there.
The list of all possible statuses is available on our support page here.
As soon as you see that you are allowlisted on the Polkastarter Dashboard or Projects Page, you can be sure that you will be able to participate in the sale once the countdown reaches zero.

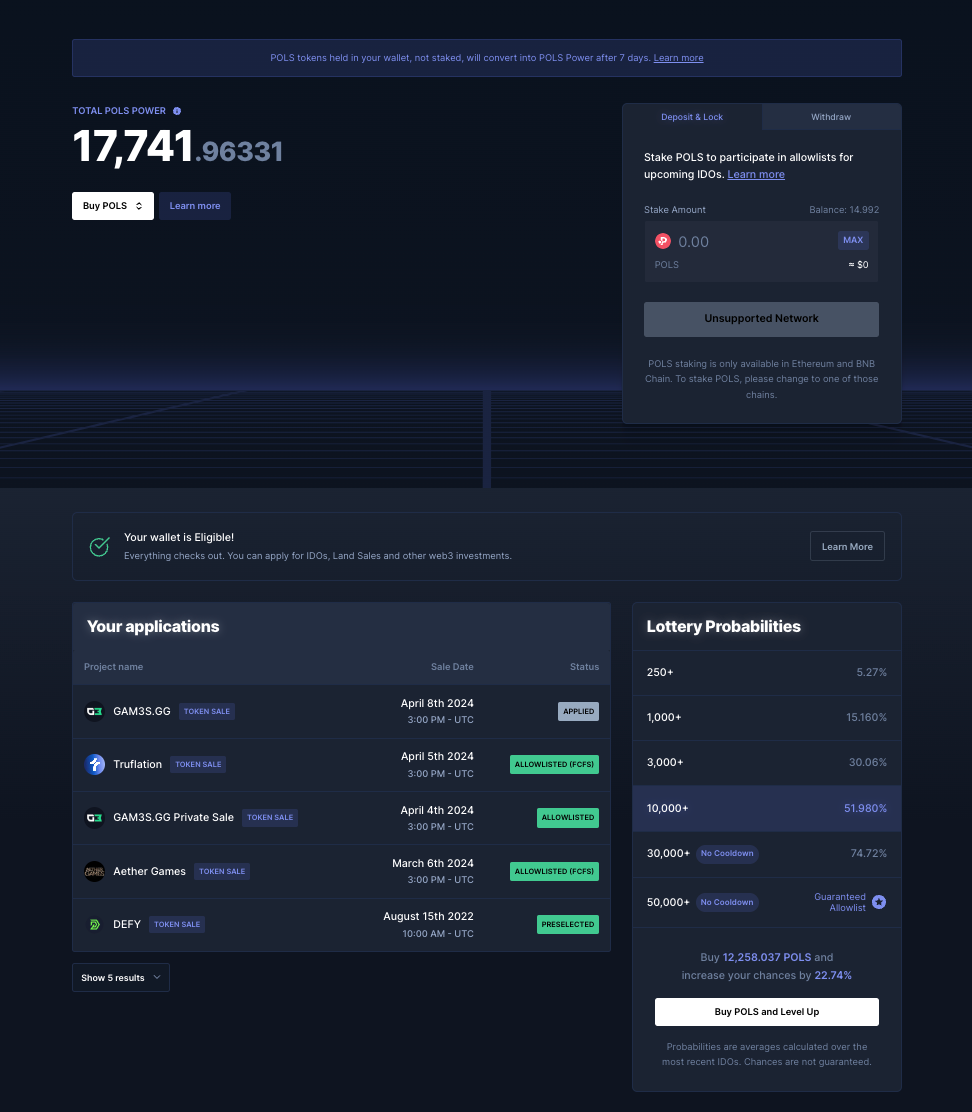
You can see your allowlist application status on both, the dashboard (left) and the project page (right).
Step 3: Prepare for the Token Sale
On the day of the IDO or Private Sale, head over to the official page of the project you were allowlisted for. You can find it on our website, where all sales are hosted and you can find all the up-to-date information about upcoming projects, too!
You are likely to be greeted by a Captcha test and that’s entirely normal. We advise you to be on the website a good 5-10 minutes prior to the sale (you can see the time in the bottom right corner of the image below) - to prep your wallet and ensure access.
Although the allocation is guaranteed for all allowlisted participants (with 'Allowlisted' application status), a limited time is designated to buy your allocation in a guaranteed mode. If you are late, you may not be able to secure your allocation as after the guaranteed window closes, the sale opens up to the FCFS participants (users with 'Allowlisted FCFS' status). And then it is very common for sales to last only a few minutes so be there or be square!
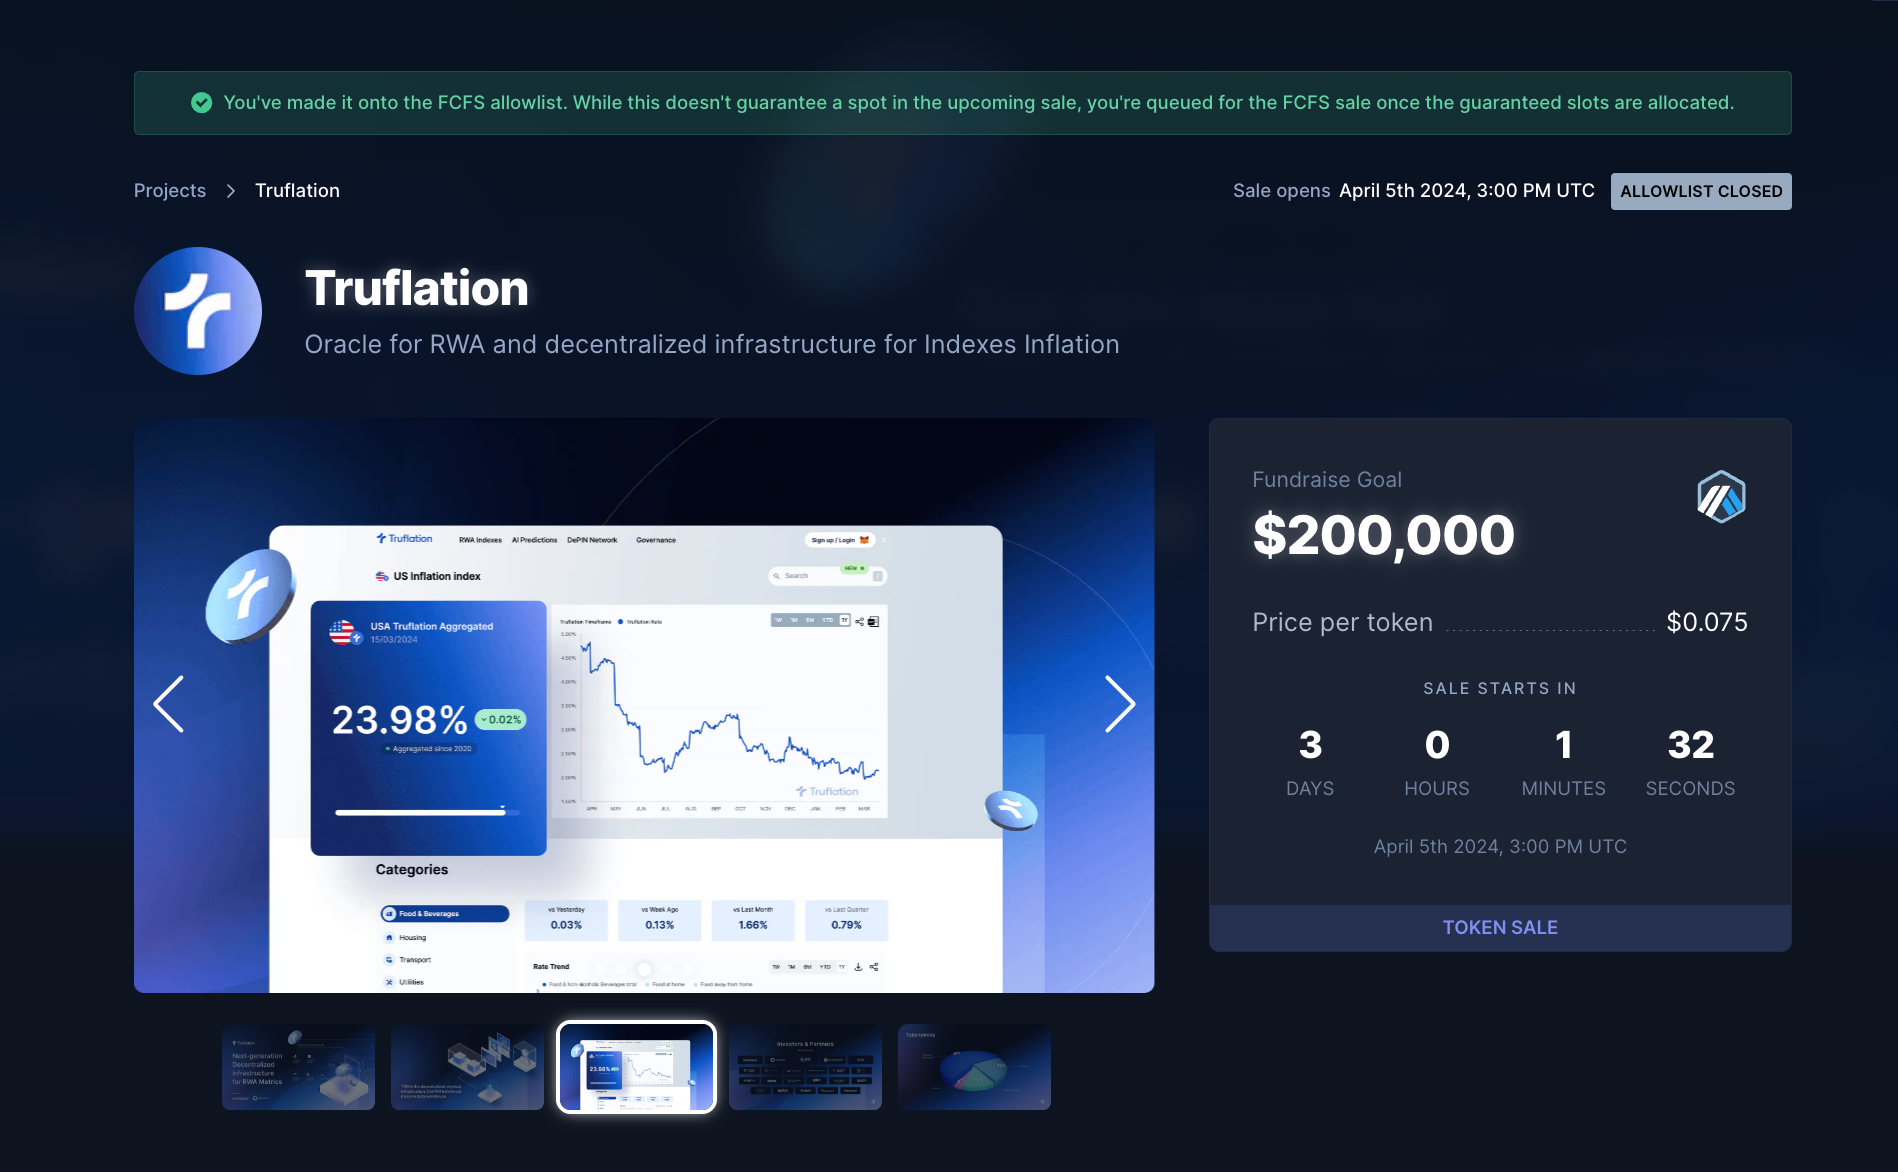
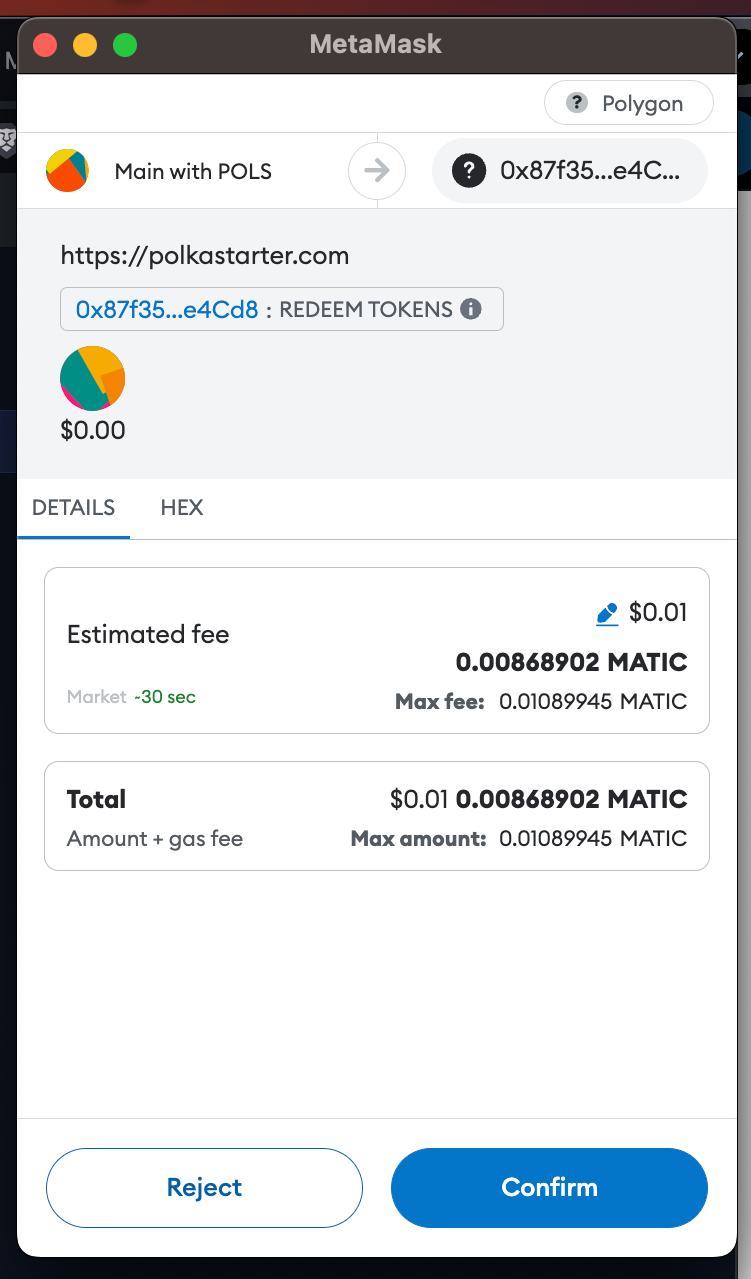
Make sure to connect your MetaMask wallet and double-check the network your wallet is set on while on the project page. You should be on the appropriate network for the sale you participate in.
If you try to connect with the other network, your wallet should be prompted with a chain switch request, which you can accept to proceed.
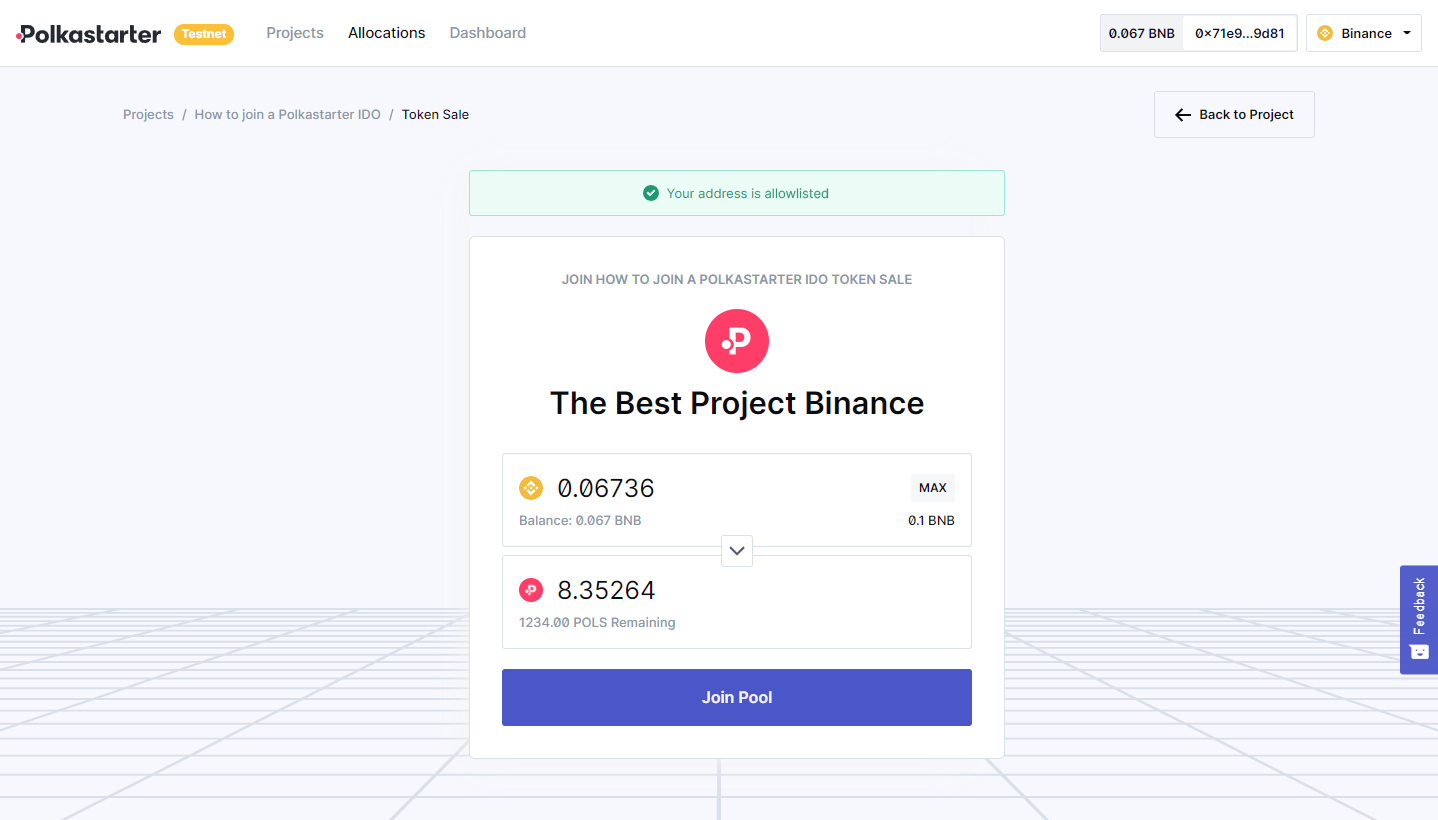
Step 4: Join the Sale
When the countdown hits 0, the page automatically refreshes. A “Join” button will appear if you are allowlisted, and clicking it leads you to another page where you can make your actual contribution through MetaMask.
Mind that you always have to accept a disclaimer before you can participate. After accepting, you can enter the amount you would like to contribute. You can also utilize the MAX button to buy your full allocation.
⚠️ Important reminder ⚠️
Gas fees, particularly on Ethereum, can sometimes be painfully high. You can use a tool such as etherscan.io/gastracker or similar ones to know how much gwei is currently needed to ensure your transaction goes through and is not stuck at “pending”. You can then adjust the gwei settings right within MetaMask to match the info from the tool you’re using.
Although of lesser importance in the guaranteed allocation phase, for the FCFS part of the sale, it's advisable to use higher gas settings to make sure the transaction goes through on time before the pool is filled out.
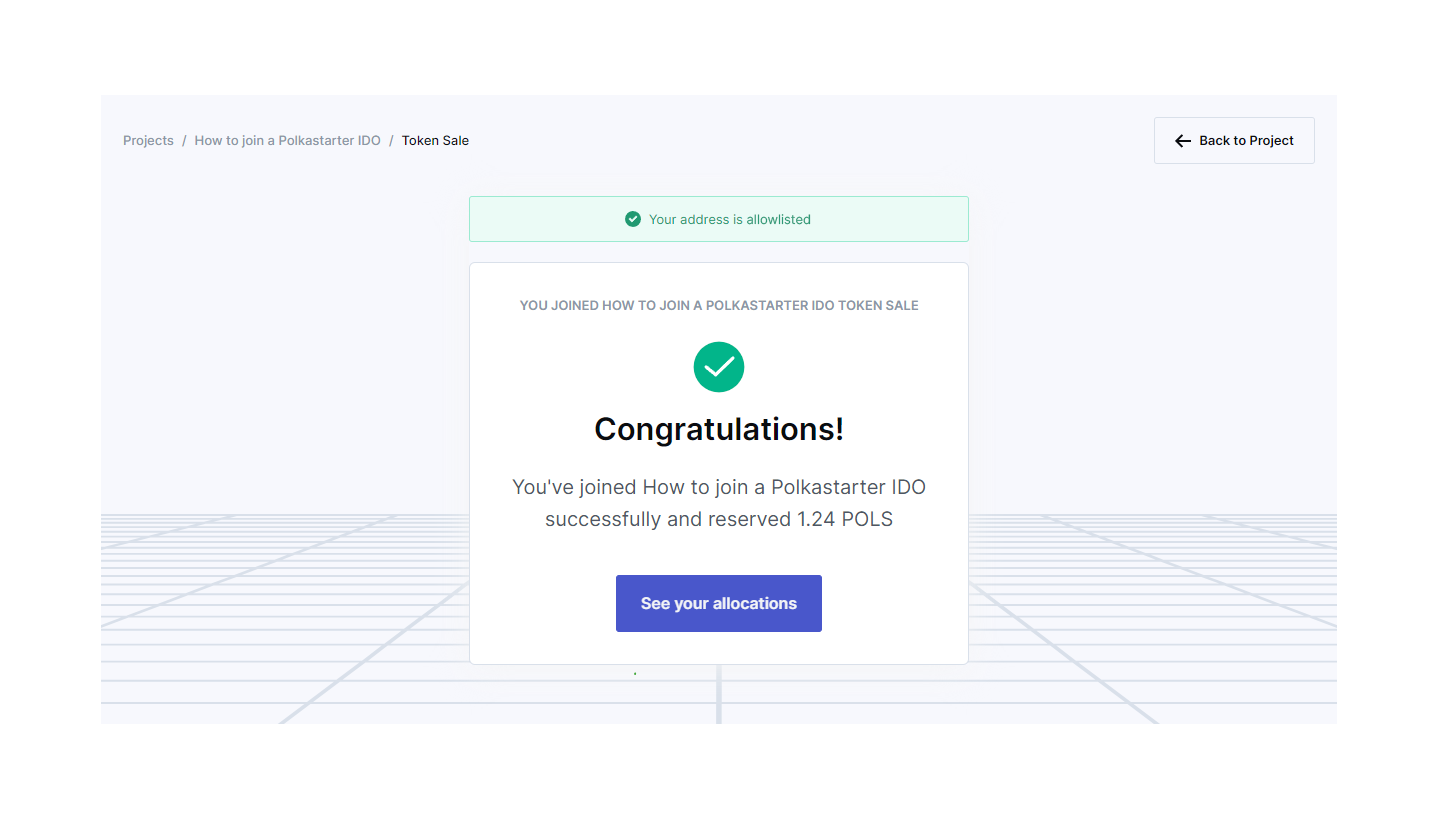
Once the transaction is confirmed on the blockchain, you have successfully secured your tokens and are now the happy token owner of whatever project you chose to support.
Step 5: Enjoy your new tokens!
After a minute or two of the confirmation, the Portfolio page updates to show your successful participation in the sale. From here, once the sale is finished and the tokens are distributed, you can claim your tokens.
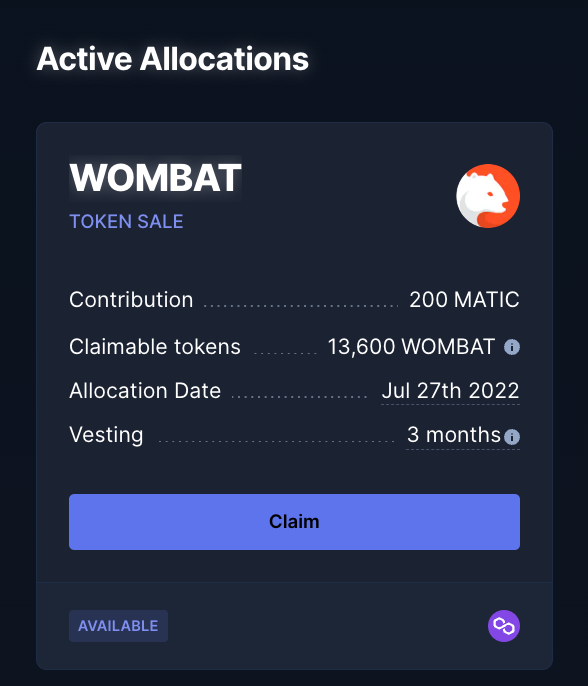
To claim your tokens, find the allocation card of the sale you just participated in and click on the "Claim" button.
Your wallet will be prompted to switch to the correct chain and pay for the gas, and voila, you are all set!

You can claim your allocation at anytime. However, if the project has linear vesting, the number of tokens to claim might be so small that it won't be worth spending the money on gas. In such case, you may want to wait for some time until the tokens accumulate.
In case of a cliff, a period during which no tokens are awarded, you may need to wait for a few months until the next batch of tokens will unlock for you. You can always check the vesting schedule on the project page, or on the allocation card itself.
Make sure to also follow the project on their social media to stay up to date with their development and continue supporting them along the way.
Remember, with Polkastarter you get early access to the ideas of tomorrow.
And that’s all - as easy as pie. Now go grab some allowlists yourself!
About Polkastarter
Polkastarter is the leading early-stage fundraising protocol, enabling web3’s most innovative projects to kick-start their journey and grow their communities. Polkastarter allows its users to make research-based decisions to participate in high-potential public sales and be early to the future of web3.
Website | X | Discord | Telegram | Telegram Announcements | YouTube
Polkastarter Blog - Latest Polkastarter News & Updates Newsletter
Join the newsletter to receive the latest updates in your inbox.

