How to Add Avalanche to MetaMask?
Prepare your wallet for the IDO on Avalanche
To participate in Polkastarter IDOs on the Avalanche Network, follow this quick and simple step-by-step tutorial on how to add the Avalanche network (C-chain) on MetaMask:
Step 1. Download MetaMask from their official website.
They have a browser extension for Chrome, Firefox, Brave and Edge, and a mobile iOS and Android app.
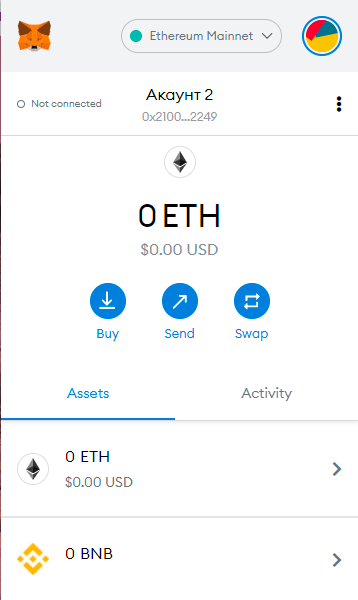
Step 2. Create a wallet by following the instructions.
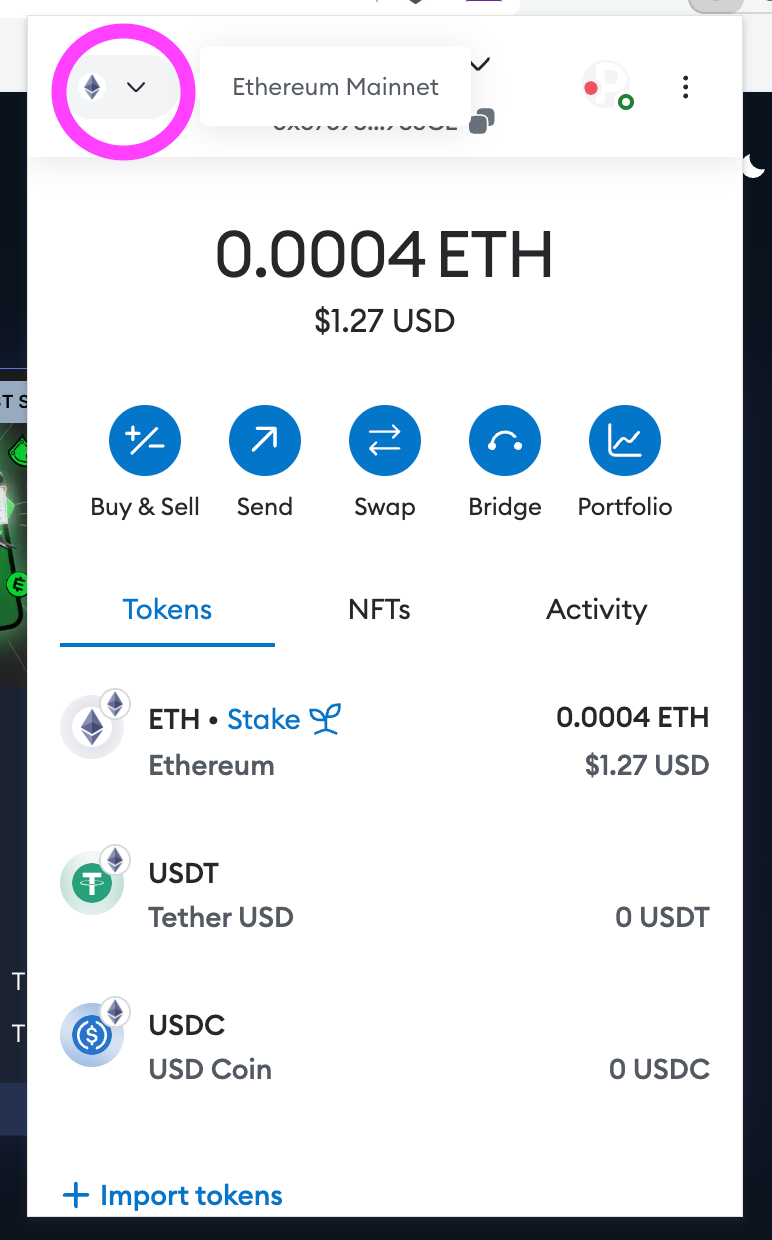
Once you get to the backup seed phrase, make sure you write it down. It would be more secure on a piece of paper rather than storing it on your computer or phone. When your wallet is ready, it should look something like this:
Step 3. Add Avalanche network.
As you can see, the default network on MetaMask is set to the Ethereum Mainnet (top right). It’s time to add Avalanche to the list. There are two options on how you can add Avalanche to your MetaMask:
Option 1. Click on the dropdown menu on 'https://polkastarter.com/' and select Avalanche.
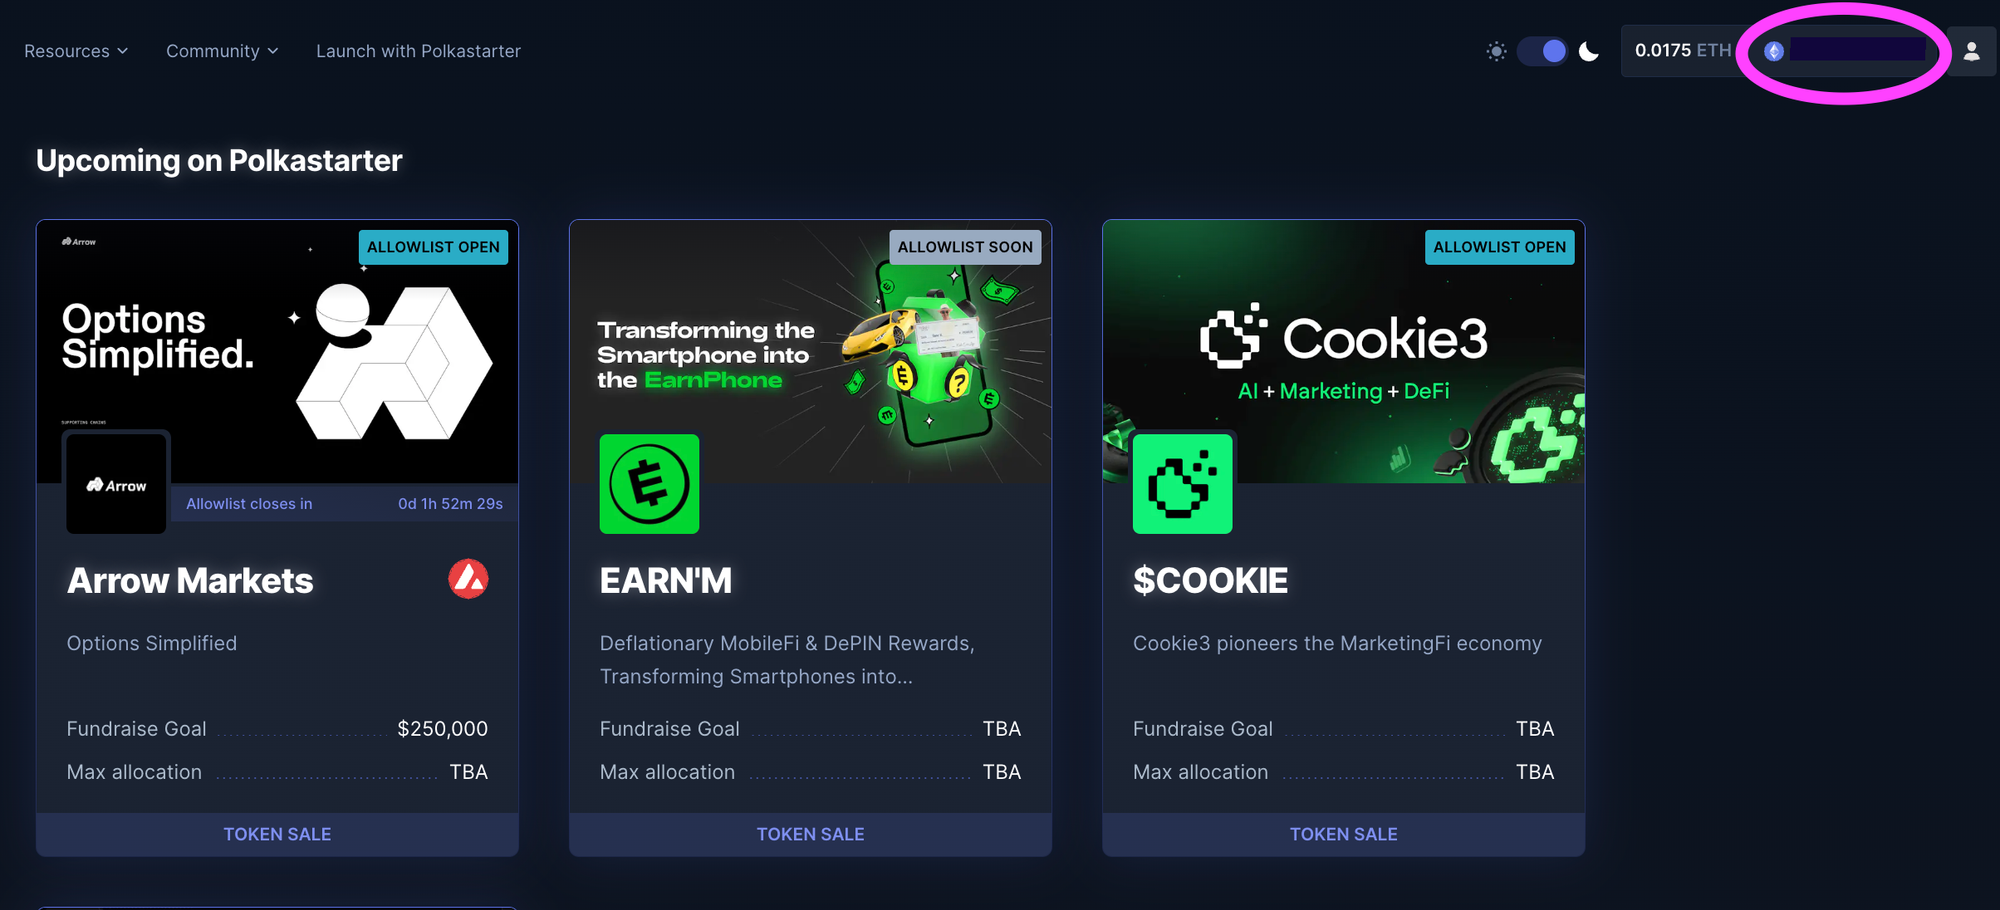
This will prompt your wallet to add Avalanche to your MetaMask.

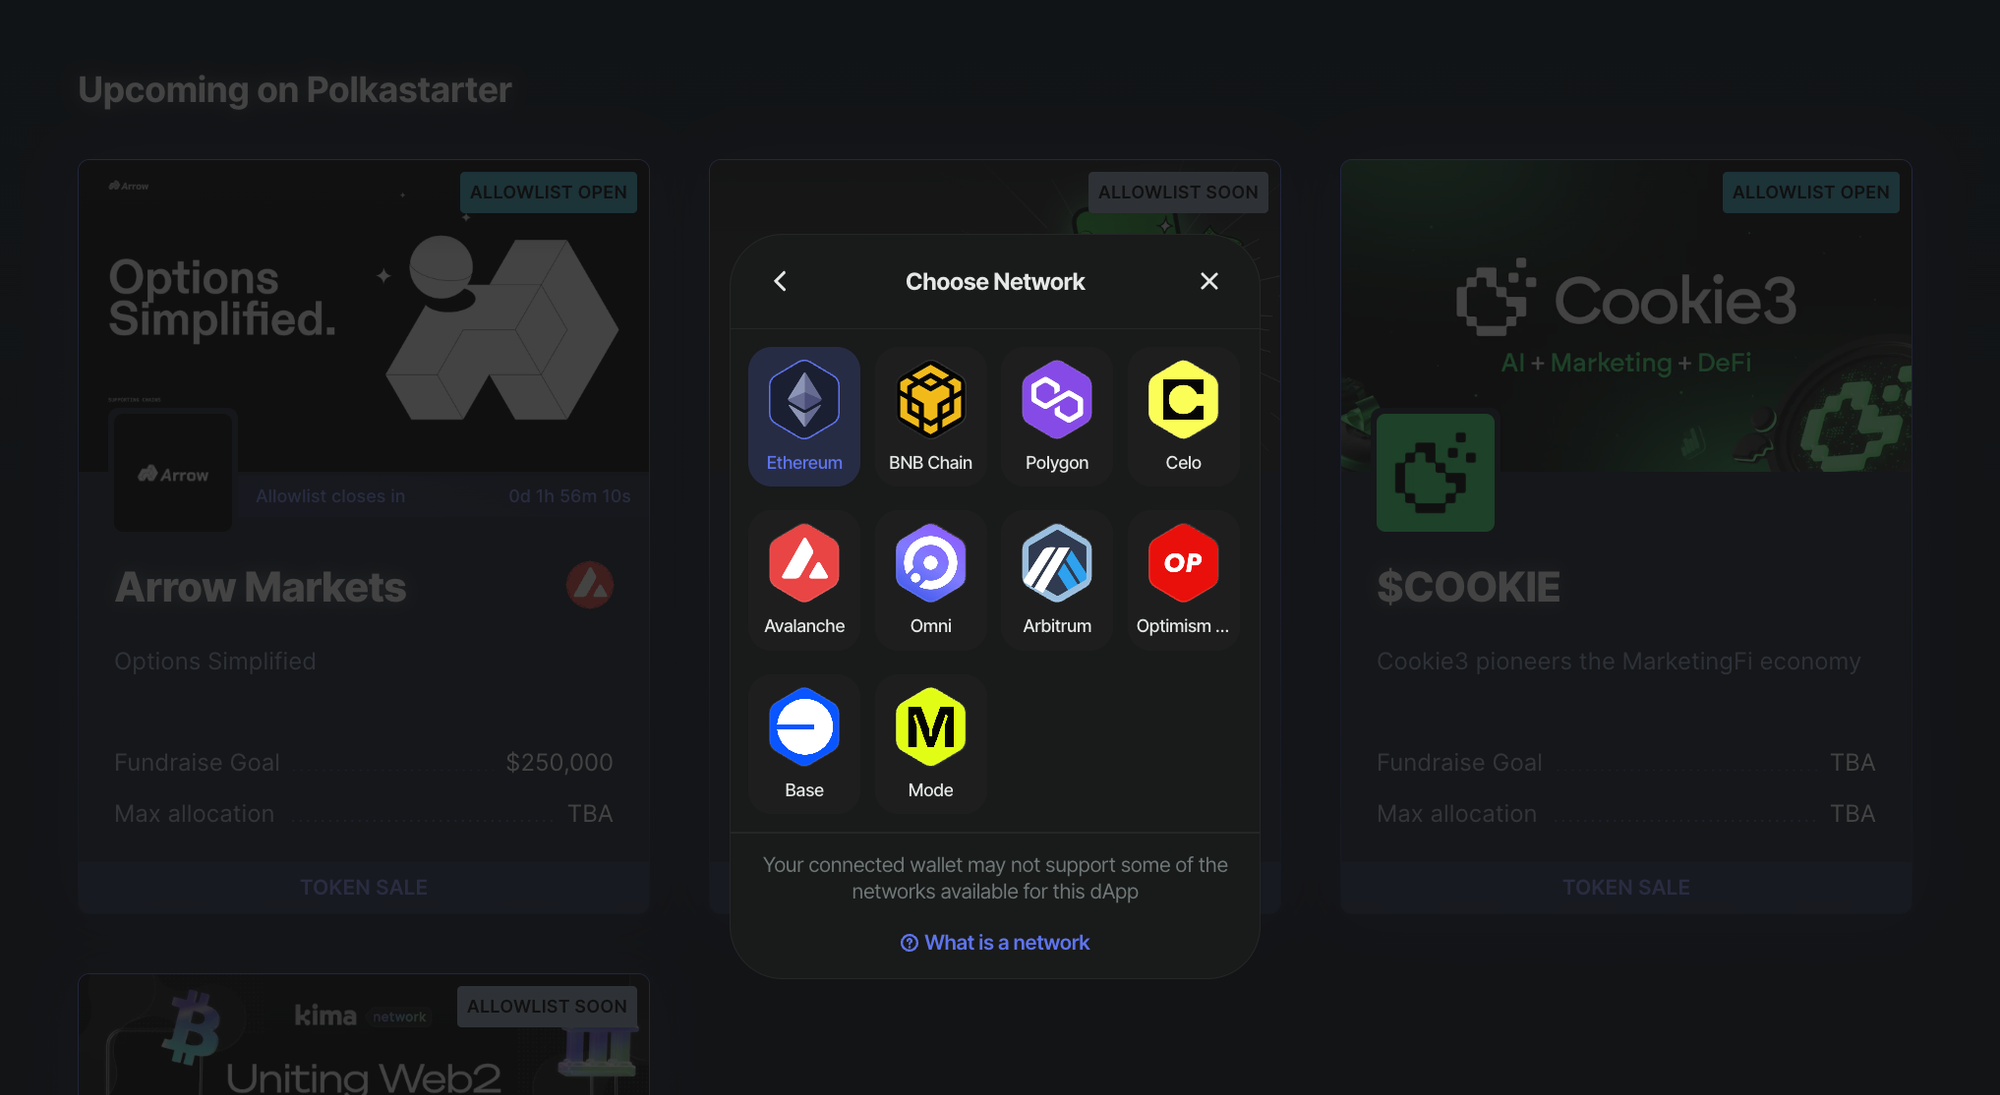
Option 2. You can add the network manually by clicking on the network icon in the top left corner, and then selecting the 'Add network' button.
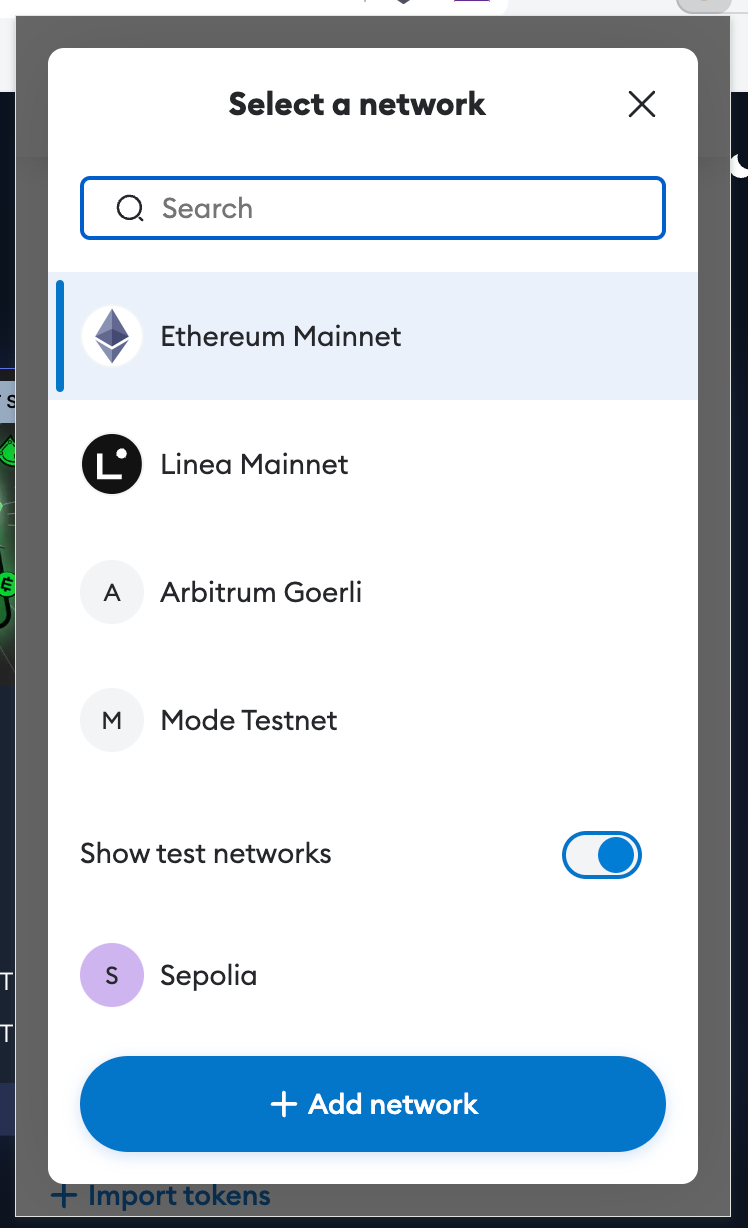
A new window will open up, showing a list of predefined networks. From that list, click on the Add button next to the Avalanche network. Then approve the network in your wallet.

Alternatively, you can add the network parameters manually.
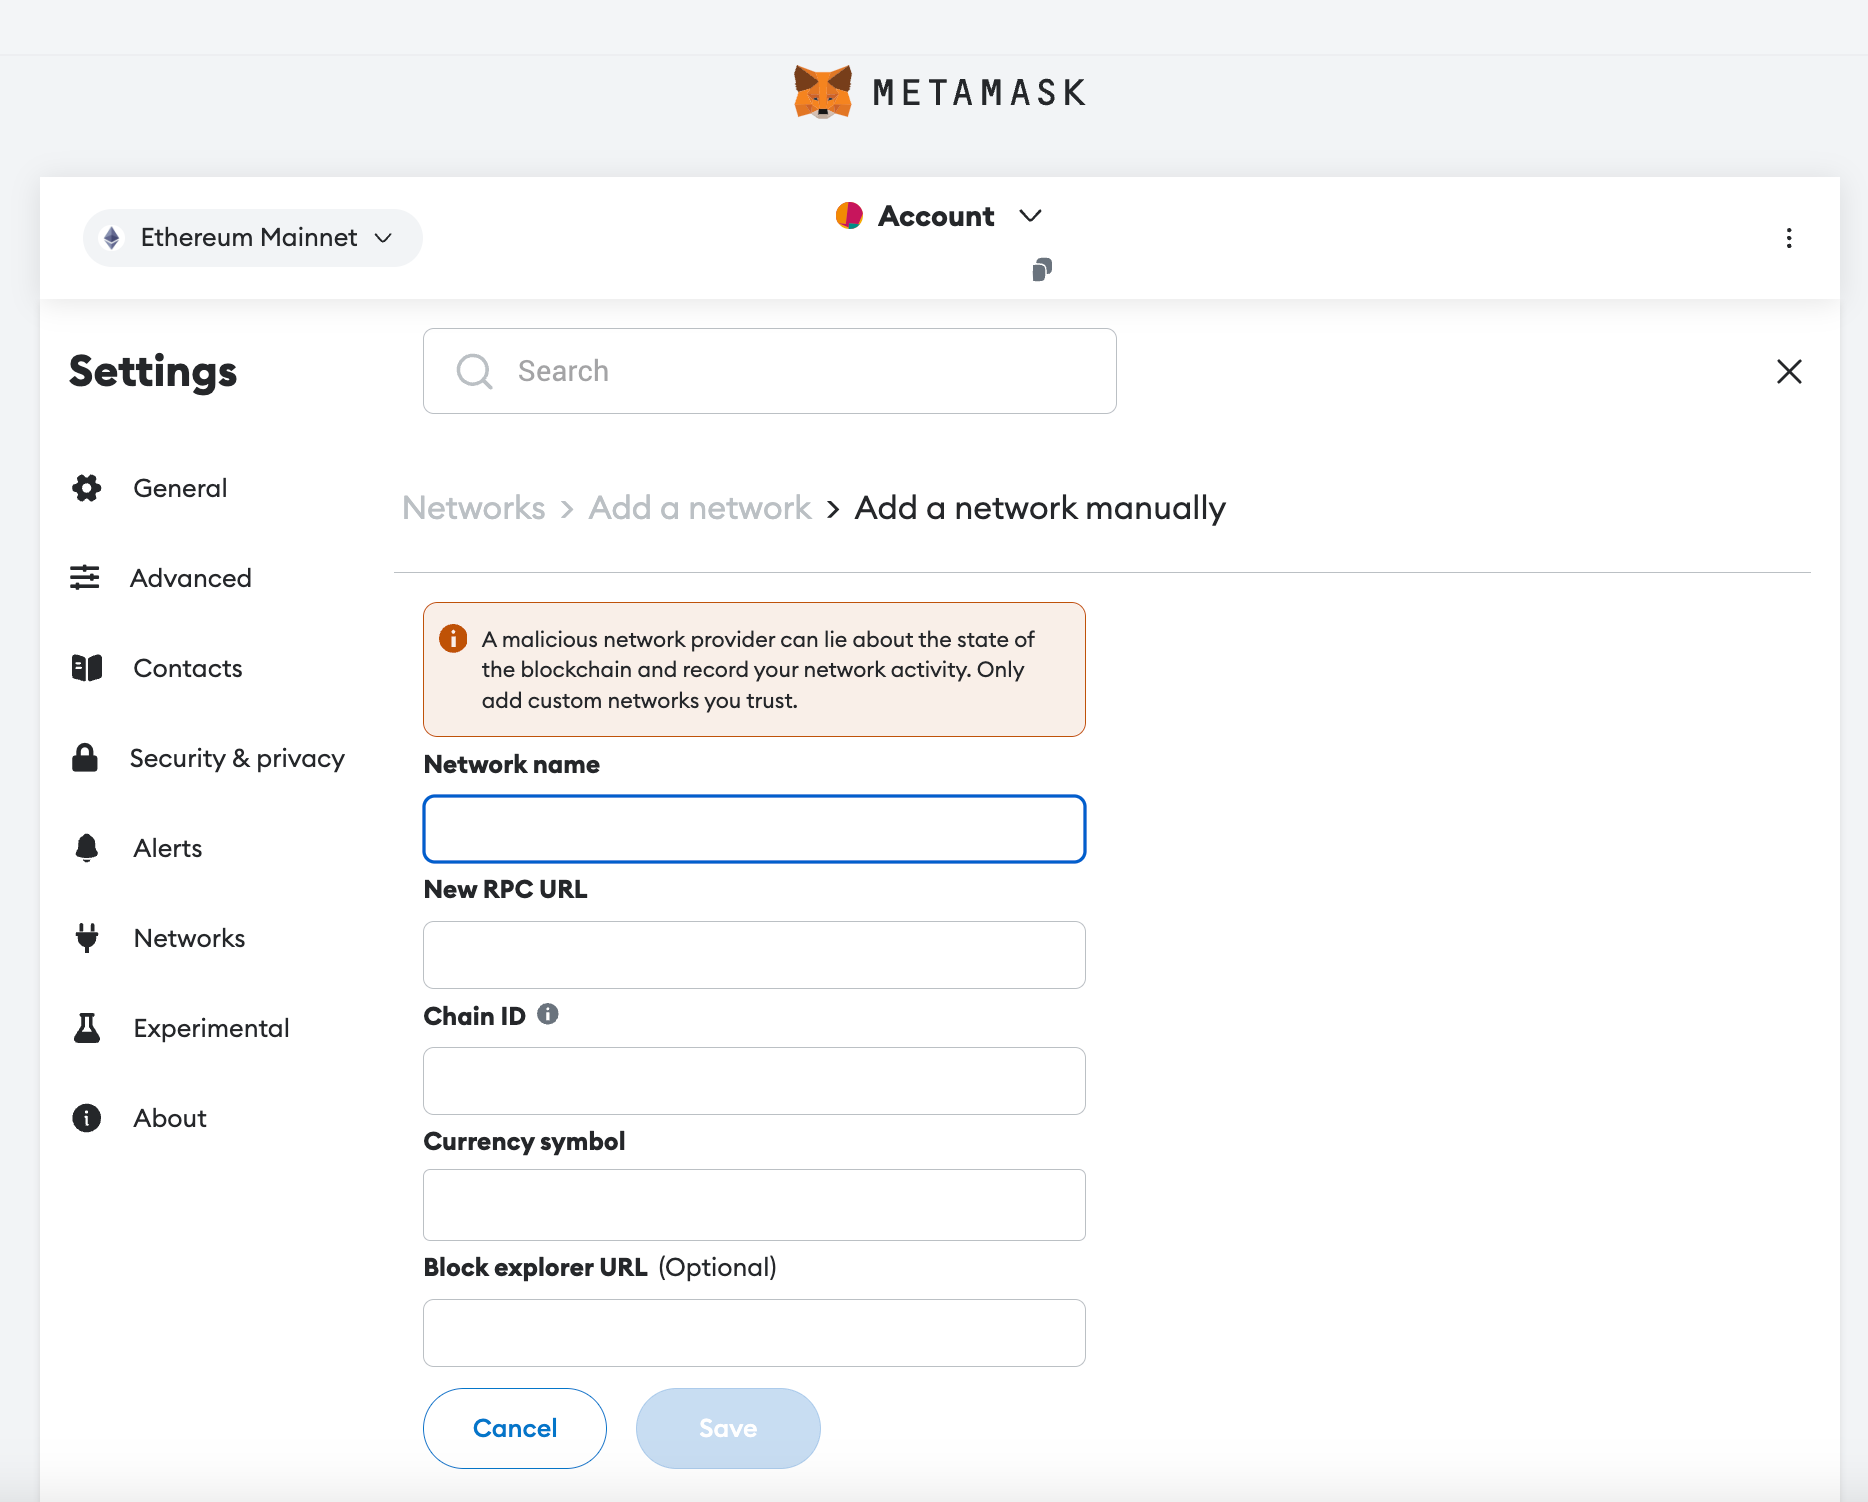
Input the following info in the boxes:
- Network Name: Avalanche Network
- New RPC URL: https://api.avax.network/ext/bc/C/rpc
- ChainID: 43114
- Symbol: AVAX
- Explorer: https://snowtrace.io/ (Note: the video still uses the previous value; Please be assured that snowtrace.io is the correct value).
Step 4. You are now ready to take part in a Polkastarter IDO on Avalanche!
About Polkastarter
Polkastarter is the leading early-stage fundraising protocol, enabling web3’s most innovative projects to kick-start their journey and grow their communities. Polkastarter allows its users to make research-based decisions to participate in high-potential public sales and be early to the future of web3.
Website | X | Discord | Telegram | Telegram Announcements | YouTube
Polkastarter Blog - Latest Polkastarter News & Updates Newsletter
Join the newsletter to receive the latest updates in your inbox.


